Now it’s difficult to pinpoint the exact problem that causes high CPU usage – usually, it’s some software or setting. We’ve compiled a list of helpful methods to fix the high CPU usage issue on Windows 11 PC.
1. Identify Apps With Higher CPU Usage
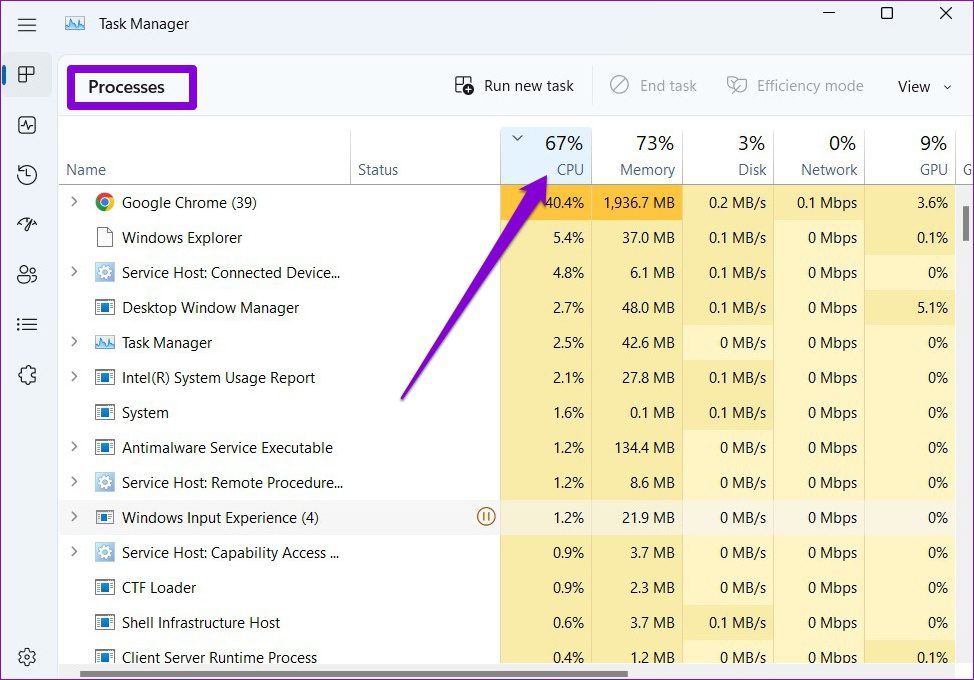
Open the Task Manager on Windows and identify apps that show higher CPU usage. Once located, you can terminate apps that you don’t need to reduce CPU usage quickly. Here’s how. Step 1: Press Ctrl + Shift + Esc keys to launch the Task Manager. Step 2: On the Process tab, you’ll find the current CPU usage tab. Click on the CPU column to sort the apps and services based on their CPU usage.
Step 3: Close all the unnecessary apps with higher CPU usage to check if that lowers the CPU usage.
Note that web browsers such as Google Chrome are notorious for consuming high CPU resources, especially when streaming something on video sites or listening to music while having multiple tabs open.
2. Limit Background Apps
If you’ve got too many apps and programs running in the background, then they might end up hogging the CPU every so often. You can disable certain less useful apps from running in the background entirely to avoid this. Here’s how. Step 1: Press the Windows key + I to open the Settings app. Click on the Apps option in the left column and click on ‘Installed apps’ in the right pane.
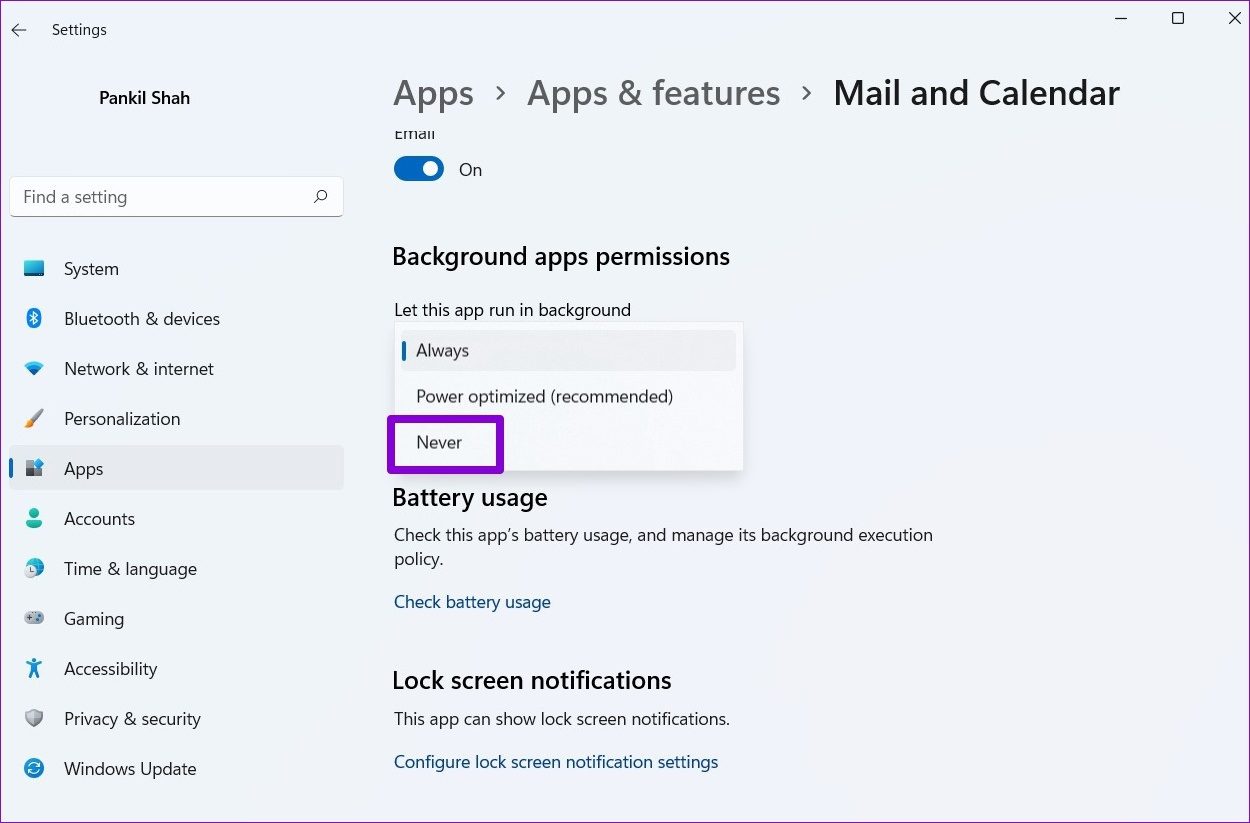
Step 2: Locate the app you wish to disable. Click on the three-dot menu next to it to select Advanced options.
Step 3: Under Background apps permissions, use the drop-down menu to choose Never.
Repeat the same for all the apps you don’t want to run in the background.
3. Restore Power Plan to Default Settings
Windows 11 allows you to choose from different power plans to prioritize performance, battery life, or strike a balance in between. If you’ve tweaked any of the power plan settings to increase the battery life, you might face such performance issues. You can easily undo those changes by restoring the power plan to default settings. Here’s how. Step 1: Press Windows key + S to open Windows Search, type in edit power plan, and click on the first result that appears.
Step 2: In the following window, click on ‘Restore default settings for this plan’ at the bottom. Click on Yes on the prompt that follows.
Restart your PC and try using it again to monitor whether this fixes the high CPU usage.
4. Disable Superfetch Service
Superfetch (Sysmain) is a service that allows apps on Windows to load content even before you open them. However, depending on the number of apps you use and your PC’s configuration, the CPU usage can also bump significantly. To fix this, you can disable the Superfetch service for some time. Here’s how. Step 1: Press the Windows key + R to launch the Run command. Type in services.msc in the box and press Enter.
Step 2: Locate the SysMain service on the list and double-click on it to open its properties.
Step 3: Change the Startup type to Disabled and hit Apply followed by OK.
Restart your computer to apply the changes and monitor if it still shows high CPU usage in the Task Manager.
5. Disable Cortana
Many users have also reduced CPU usage after disabling Cortana on Windows. Although Microsoft’s digital assistant is much less intrusive on Windows 11, it might hog system resources at times. Step 1: Press the Windows key + I to open the Settings app. In the Apps tab, click on Installed apps.
Step 2: Scroll down to locate Cortana, click on the three-dot menu next to it, and select Advanced options.
Step 3: Lastly, toggle off the Cortana option under the ‘Runs at log-in’ section.
6. Wait for Windows to Finish Updates
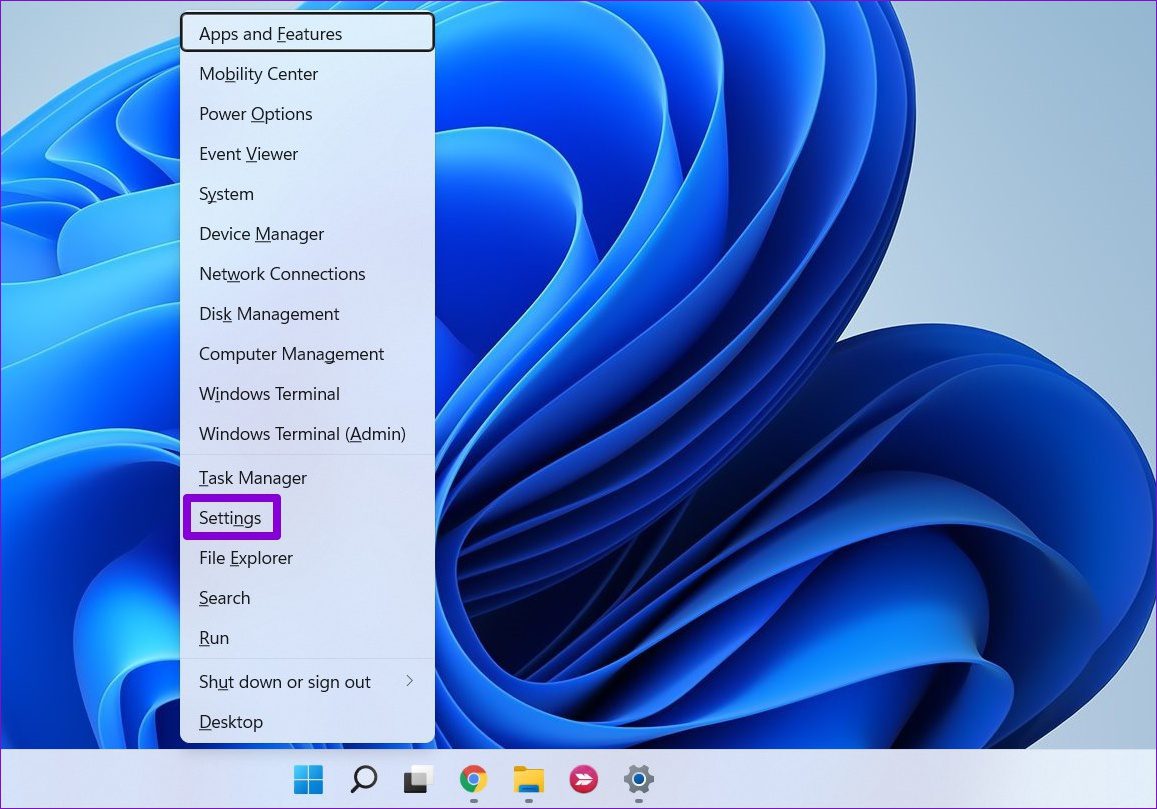
If Windows 11 is in the process of checking, downloading, or installing any updates in the background, you might find that CPU usage increases for that time. You can check whether Windows is in the process of downloading or installing any updates from the Settings app. Step 1: Right-click on the Start menu and select Settings from the list.
Step 2: Visit the Windows Update tab and see the Windows Update status.
If your Windows PC is downloading any updates, wait for them to install properly. If the updates are downloaded already, restart your PC to install them.
7. Check Power Supply
Issues with your power supply can also lead to high CPU usage issues on Windows 11 desktop. If your PC is not getting enough power, Windows will try to adjust accordingly and may not work at its full capacity. You can inspect the power cable connected to your desktop for any cuts or damages.
8. Scan for Malware and Disable Third-Party Antivirus Software
The presence of malware is yet another reason why CPU usage might shoot up from time to time. You can use the Windows Security app to run a full scan of your PC check for any threats.
Additionally, using third-party antivirus programs on Windows might also lead to such anomalies. Typically, third-party antivirus programs can strain your PC by constantly running scans in the background. If that’s the case, disabling automatic scans in the antivirus program will help.
9. Leave Windows Insider Program
If you’ve signed up for the Insider Program, you might be using one of the Preview or Dev builds of Windows 11. Since these builds are unstable, they might be consuming unnecessary resources on your PC. To avoid this, you can consider leaving the Windows insider program. Step 1: Press the Windows key + I to open the Settings app. Step 2: Navigate to Windows Update and click on Windows Insider Program.
Step 3: Under Stop getting preview builds, toggle on the ‘Unenroll this device when the next version of Windows releases’ option.
Restart your PC to ensure all the changes are in effect.
10. Perform System Restore
A recent change in the system settings or an app installation may have created a high CPU usage problem on Windows 11. If you can’t seem to identify the culprit, you can use System Restore on Windows to revert to a point before the high CPU usage problem appeared first. Before proceeding, remember that you might lose any recent data or changes if you perform a system restore. Step 1: Open the Start Menu, type in create a restore point and click on the first result that appears.
Step 2: Under the System Protection tab, click on the System Restore button.
Step 3: Select the recommended restore point or pick one yourself by choosing the second option and hitting Next.
From there, follow the on-screen instructions to perform the system restore.
Always Under Control
At times, it’s natural for a PC to show high CPU usage while watching a 4K movie or playing graphics-intensive games on your PC, especially in the absence of a dedicated GPU. But if your computer constantly shows higher CPU usage in the Task Manager, follow the methods mentioned above to investigate and troubleshoot the issue for good. The above article may contain affiliate links which help support Guiding Tech. However, it does not affect our editorial integrity. The content remains unbiased and authentic.


![]()

