However, tweaking too many policies without caution may break some of the features or cause Windows to behave strangely. Thankfully, you can always reset the Local Group Policy settings and take things back to normal again. In this post, we’ll show you how to reset Local Group Policy settings on your Windows 11 computer. Since Group Policy settings contain important settings for Windows, it’s a good idea to create a system restore point before proceeding with the changes below.
1. Reset Local Group Policy Settings Using Group Policy Editor
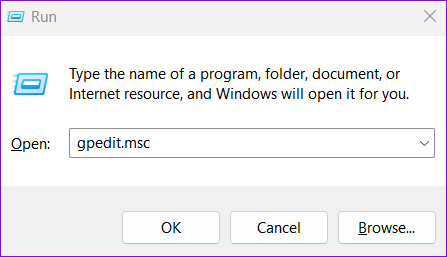
All your Local Group Policies are set to the ‘Not Configured’ state. One way to reset your computer’s Group Policy settings is to use the Group Policy Editor and revert all policies to the ‘Not Configured’ state individually. That way, you can also leave some of your important policies unaffected. Follow these steps to reset Local Group Policy settings using the Group Policy Editor. Step 1: Press the Windows key + R to open the Run dialog box. Step 2: Type gpedit.msc in the text box and press Enter to open the Local Group Policy Editor.
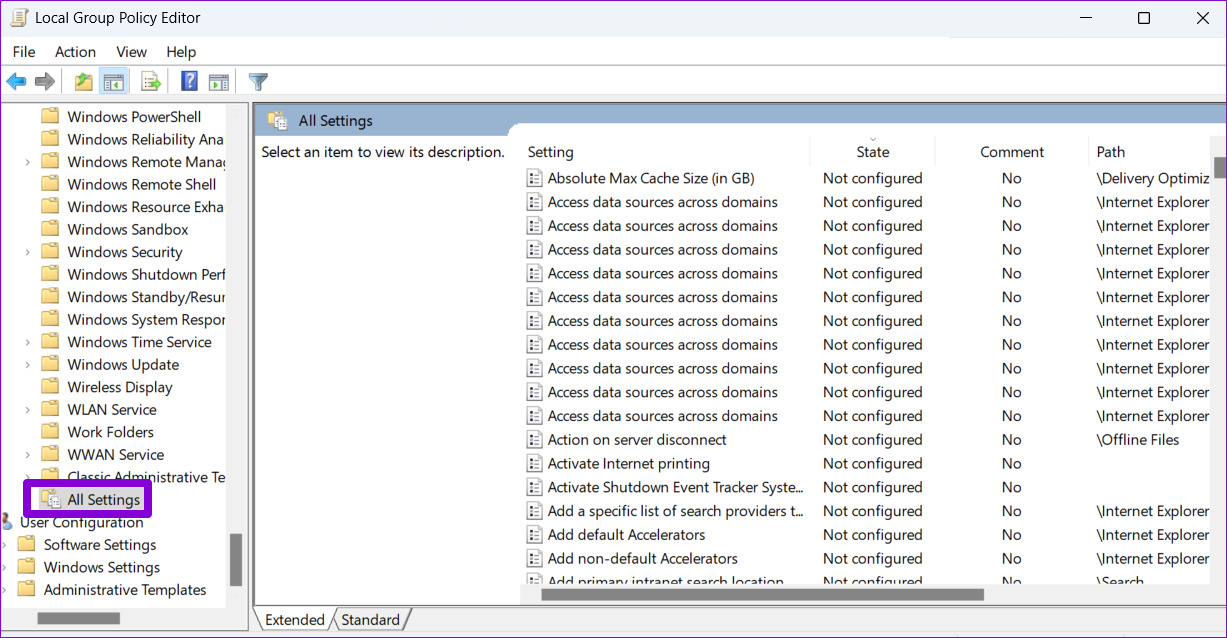
Step 3: In the Local Group Policy Editor window, use the left pane to navigate to the following folder.
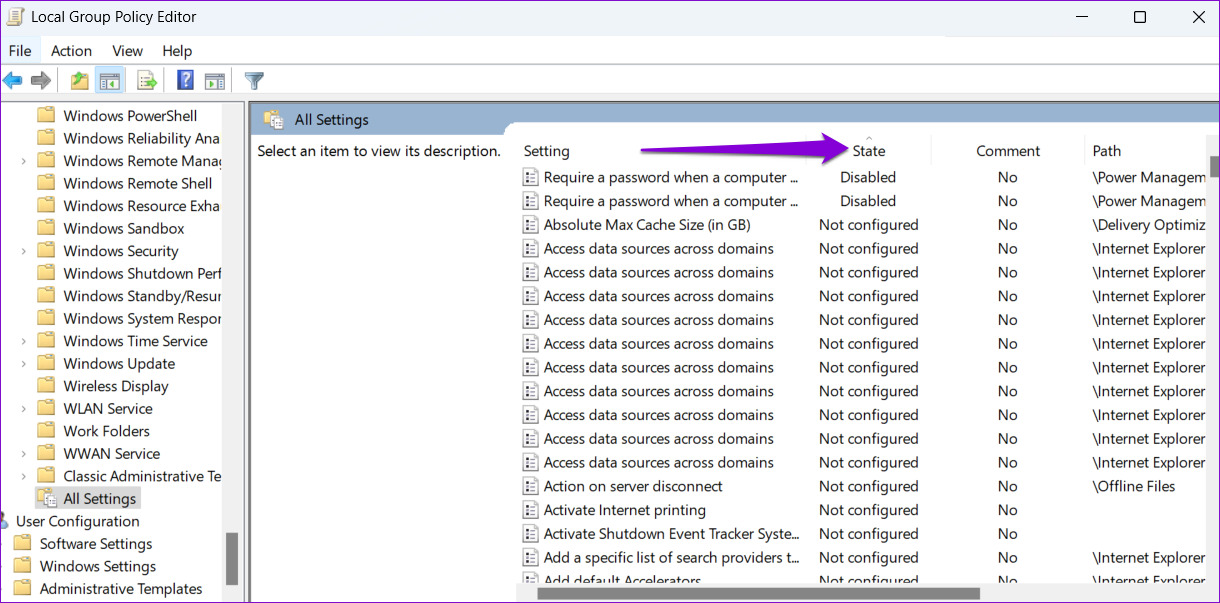
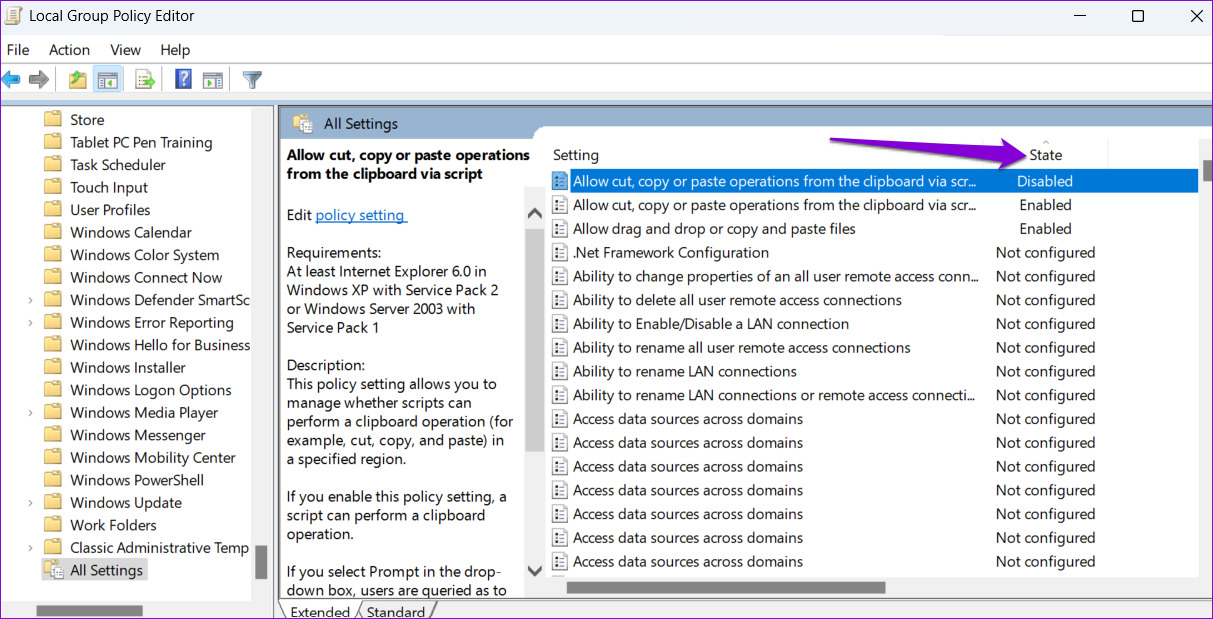
Step 4: Within the All Settings folder, you’ll find policies that apply to the local computer. Click the State column header in the right pane to see the policies you have modified.
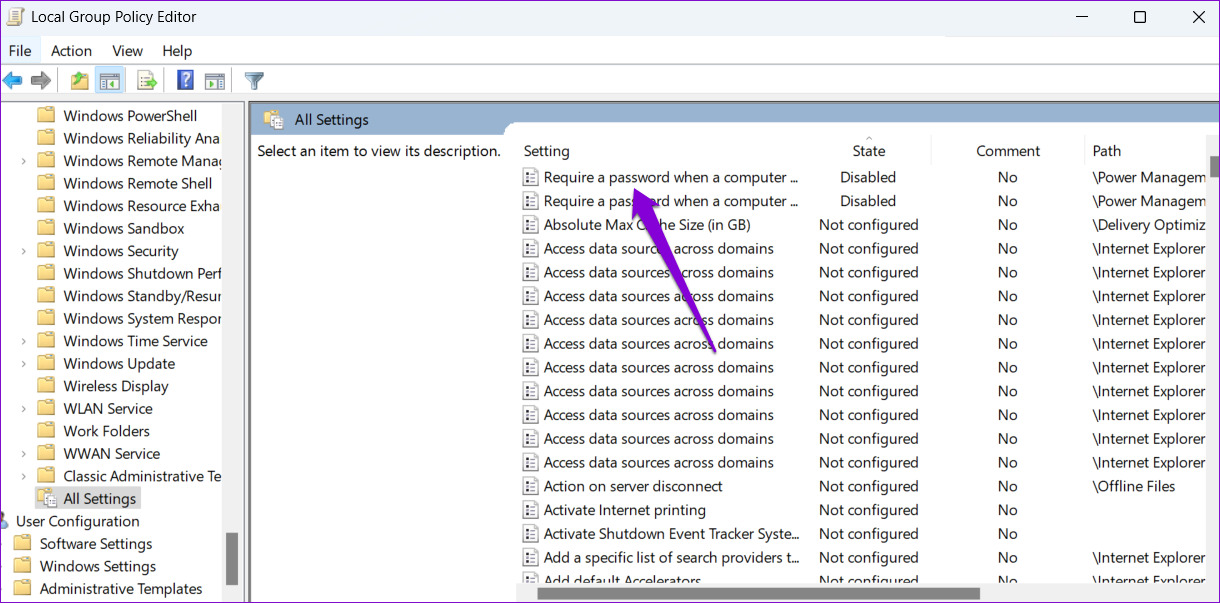
Step 5: Double-click any policy set to Enabled or Disabled state.
Step 6: Select the Not Configured option from the following window. Then, click Apply followed by OK to save changes.
Repeat the previous step for every policy you want to reset. Step 7: After resetting the Computer Configuration policies, you can reset the User Configuration policies. For that, head over to the following folder using the left pane.
Step 8: Within the All Settings folder, click the State column header in the right pane to sort your policies according to their current state.
Step 9: Check all your modified policies one by one and set them to the Not Configured state. After you complete the above steps, restart your PC to apply the changes.
2. Reset Local Group Policy Settings Using Command Prompt
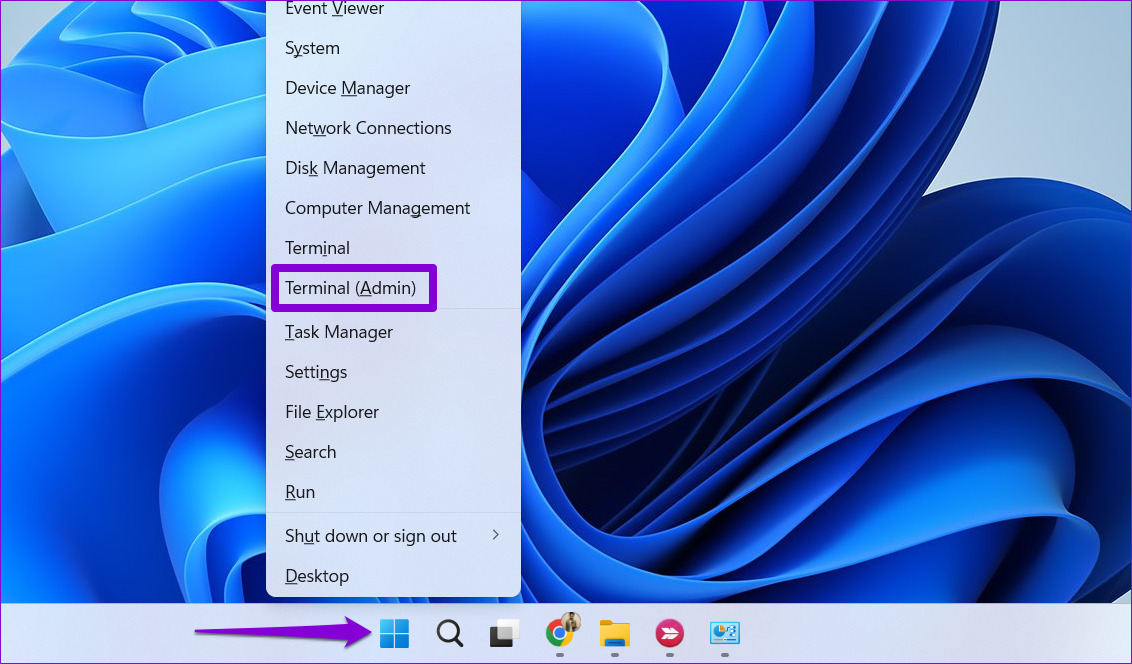
Although the Group Policy Editor makes it easy to reset policy settings, it’s not the most efficient way if you want to reset all the Group Policy settings. That’s where Command Prompt comes in. You can run a couple of commands in the Command Prompt window to reset all your Group Policy settings. To reset Local Group Policy settings using Command Prompt, follow these steps. Step 1: Right-click the Start icon on the Taskbar or press the Windows key + X to open the Power User menu. Select Terminal (Admin) from the list.
Step 2: Select Yes when the User Account Control (UAC) prompt appears.
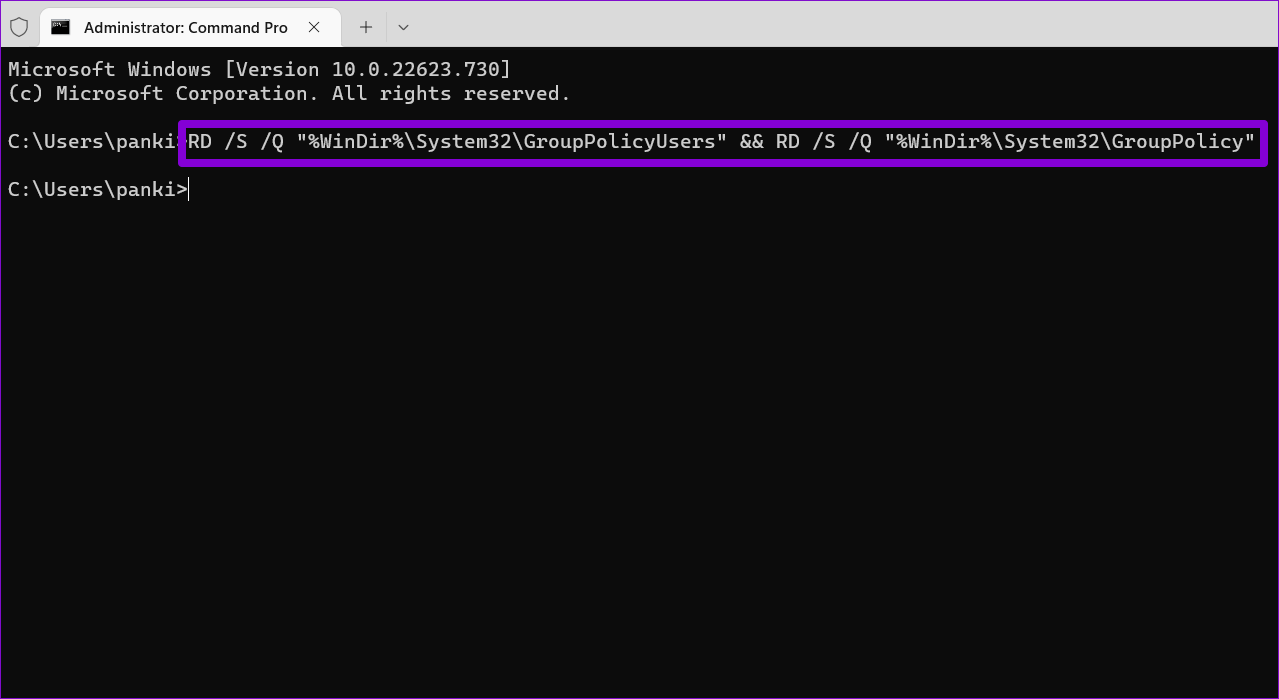
Step 3: In the console, paste the following command and press Enter to reset all the group policy objects in one go.
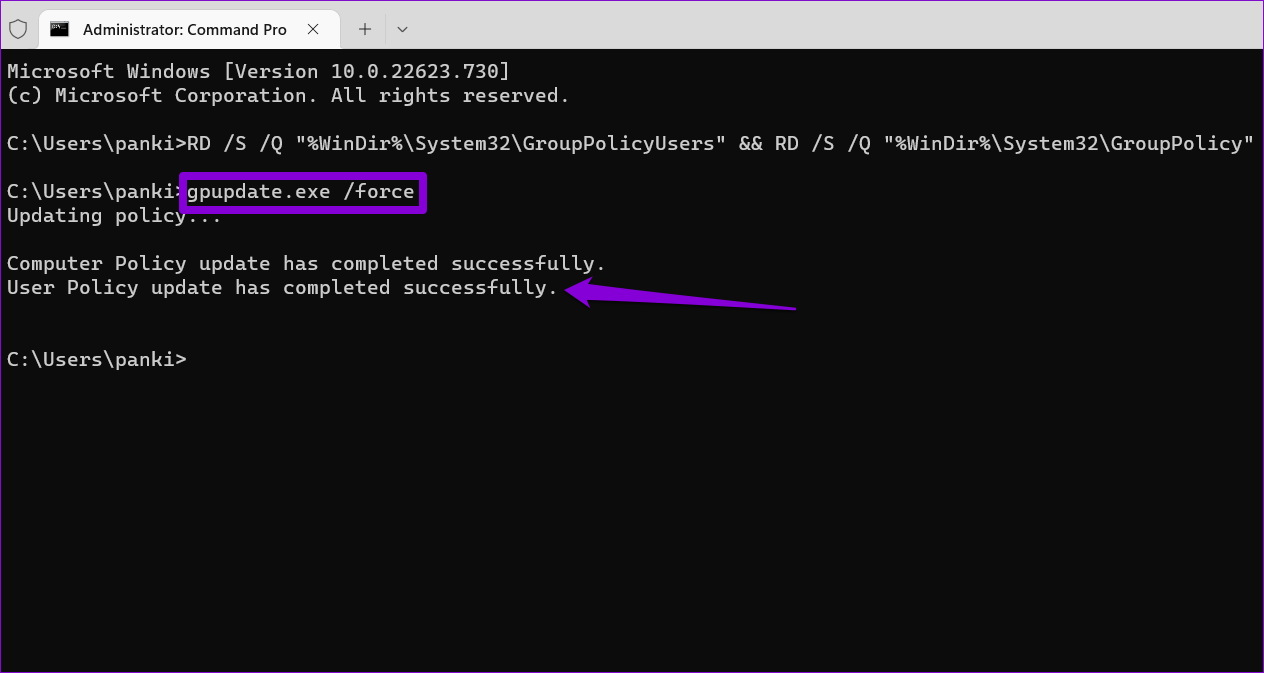
This command will delete the folders that store the Group Policy settings on your PC, effectively resetting all policies. Step 4: Lastly, type or copy and paste the following command and press Enter. It will update the changes in the Local Group Policy console.
That should do it. After running the above command, you should see a message indicating that the policy update is complete. Following that, all group policies in Windows 11 will be reset to their default values. It’s worth noting that this process does not affect the Local Security Policy section, which contains security settings for the local computer.
Start Afresh
Resetting your Local Group Policy settings could be beneficial if you’re experiencing unusual system behavior. Fortunately, Windows 11 makes it easy to reset Local Group Policy settings. You can use either of the methods listed above to accomplish that. You can use the methods mentioned above to reset Group Policy settings on PCs running Windows 10 too. The above article may contain affiliate links which help support Guiding Tech. However, it does not affect our editorial integrity. The content remains unbiased and authentic.

