Quick Access makes it easier for you to access the frequently visited files and folders. You can save precious clicks and seconds using it. However, if you’re experiencing an issue with Quick Access, here are some troubleshooting tips that will help fix it.
1. Check File Explorer Options
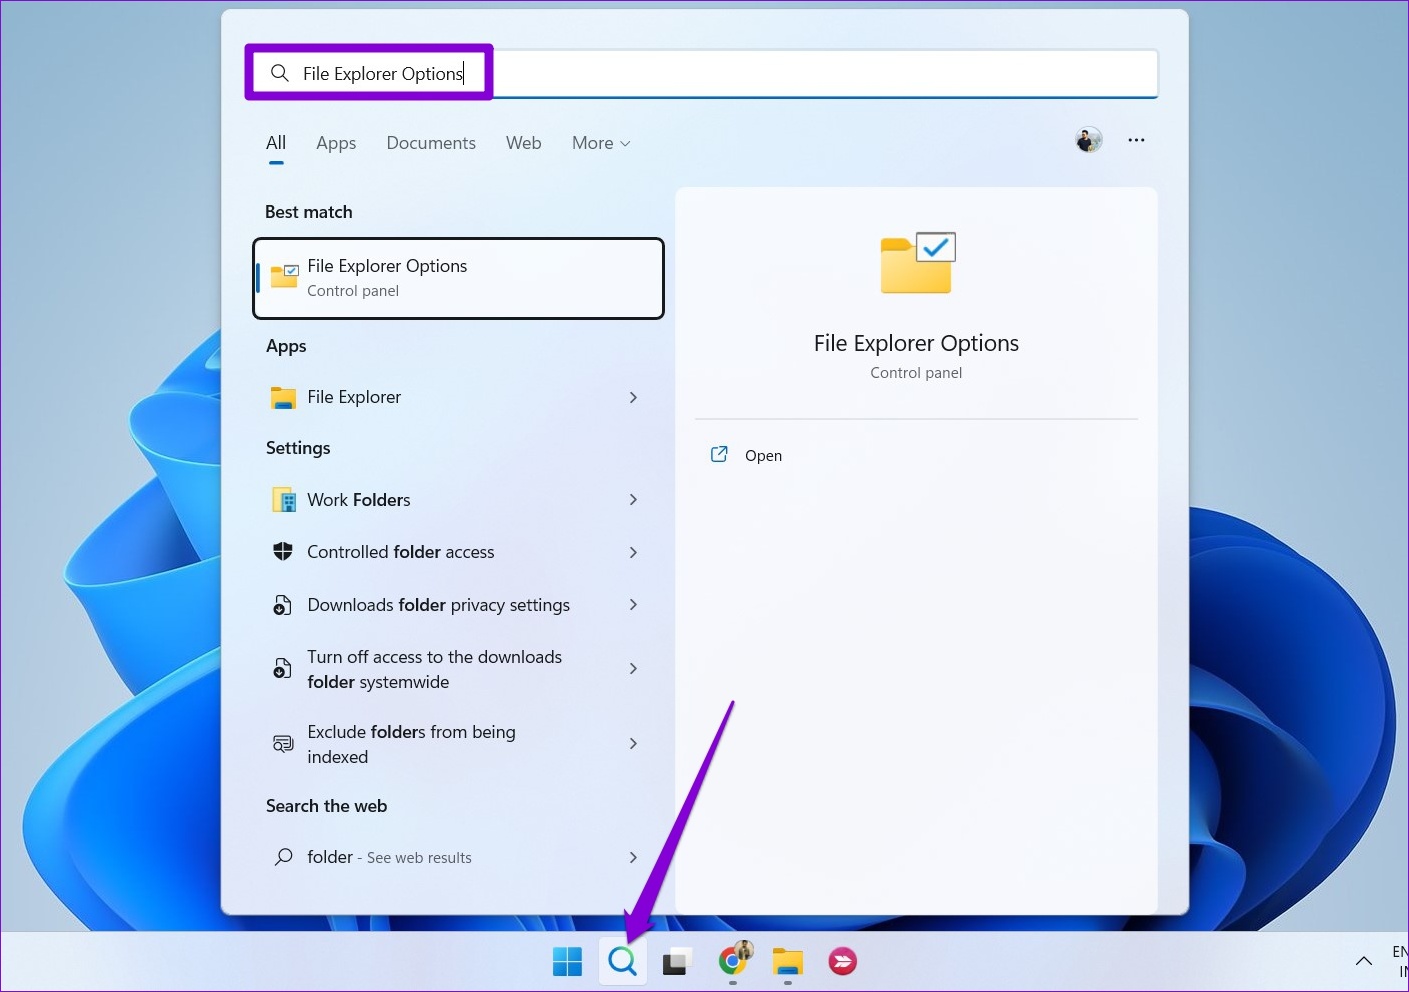
If Quick Access is not showing your recently opened files and frequently used folders, check File Explorer’s Options to ensure that the feature is enabled. Here’s how to do it. Step 1: Click the search icon on the Taskbar or press the Windows key + S to open the search menu. Type file explorer options in the box and select the first result that appears.
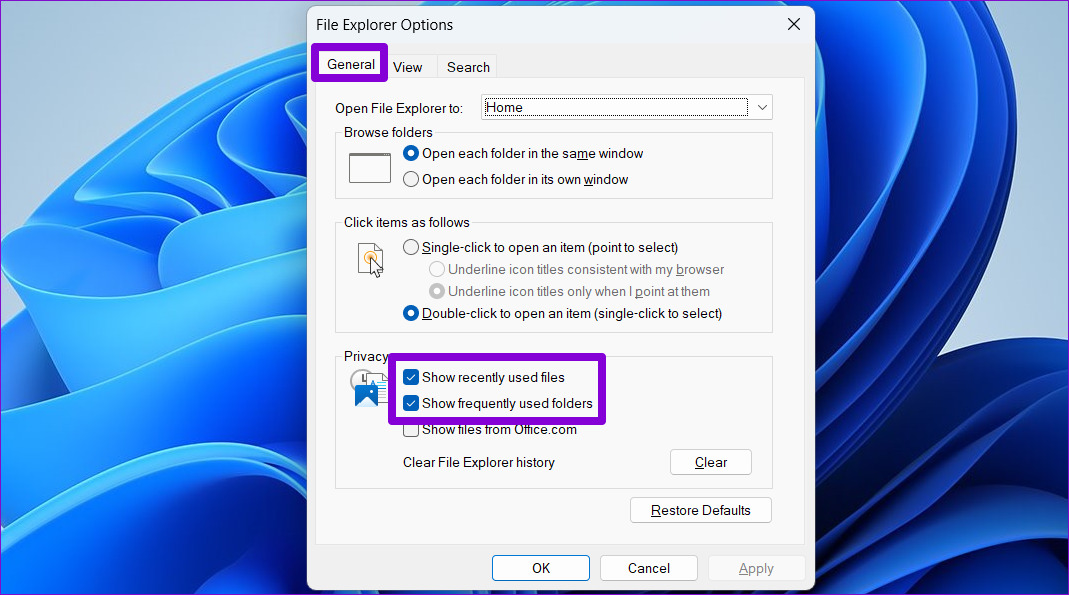
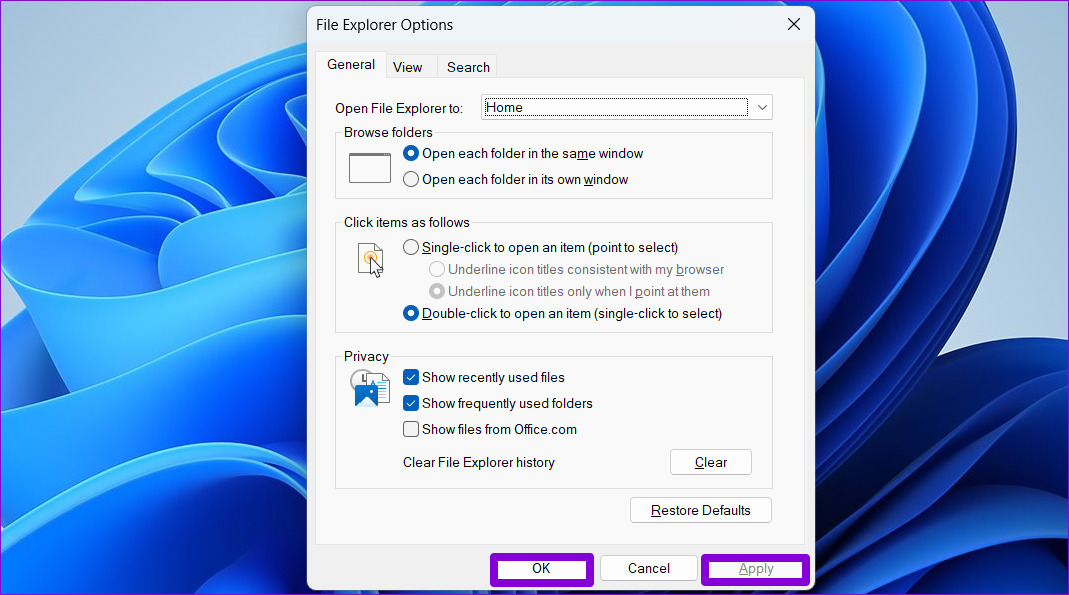
Step 2: Under the General tab, check the boxes that read ‘Show recently used files’ and ‘Show frequently used folders.’
Step 3: Click Apply followed by OK.
Open a few files and check if they appear under the Recent section of Quick Access.
2. Enable Recent Items in Start, Jump Lists, and File Explorer
Another reason Quick Access may not show your recent files is if you’ve disabled the ‘Show recently opened items in Start, Jump List, and File Explorer’ option in the Settings app. Here’s how to enable it. Step 1: Open the Start menu and click the gear-shaped icon to launch the Settings app. Alternatively, you can use the Windows key + I shortcut to achieve the same.
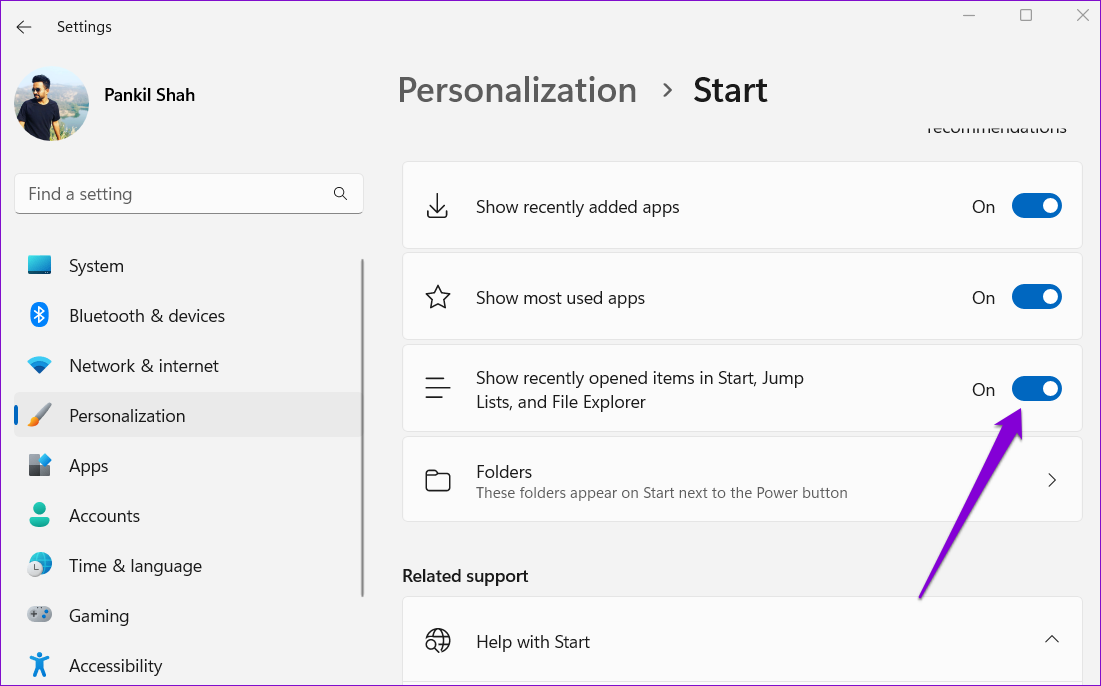
Step 2: Use the left pane to navigate to the Personalization tab. Then, click on Start.
Step 3: Toggle on the switch next to ‘Show recently opened items in Start, Jump List, and File Explorer.’
After this, all your recent files should appear in Quick Access.
3. Clear Quick Access Cache Data
If Quick Access takes forever to load or fails to open at all, the problem could be with the existing Quick Access cache data. In that case, getting rid of that data might get things moving again. Here’s how to do it. Step 1: Right-click on the Start icon and select File Explorer from the list.
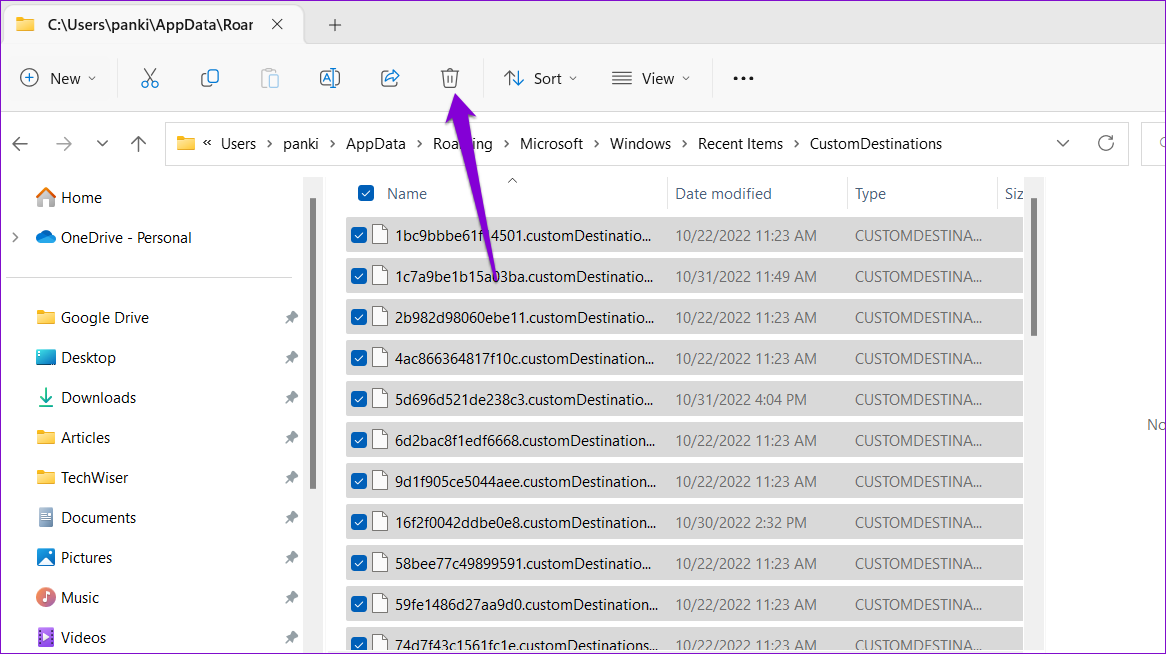
Step 2: Paste the following path in the address bar at the top and press Enter: Step 3: Press Ctrl + A to select all the files and click the trash icon at the top to delete them.
Step 4: Next, navigate to the following folder: Step 5: Delete all the files within the folder.
4. Restore Folder Options
If clearing Quick Access cache data does not help, you can reset the folder options in Windows by following the steps below: Step 1: Press the Windows key + E to launch File Explorer. Click the three-dot menu icon at the top and select Options.
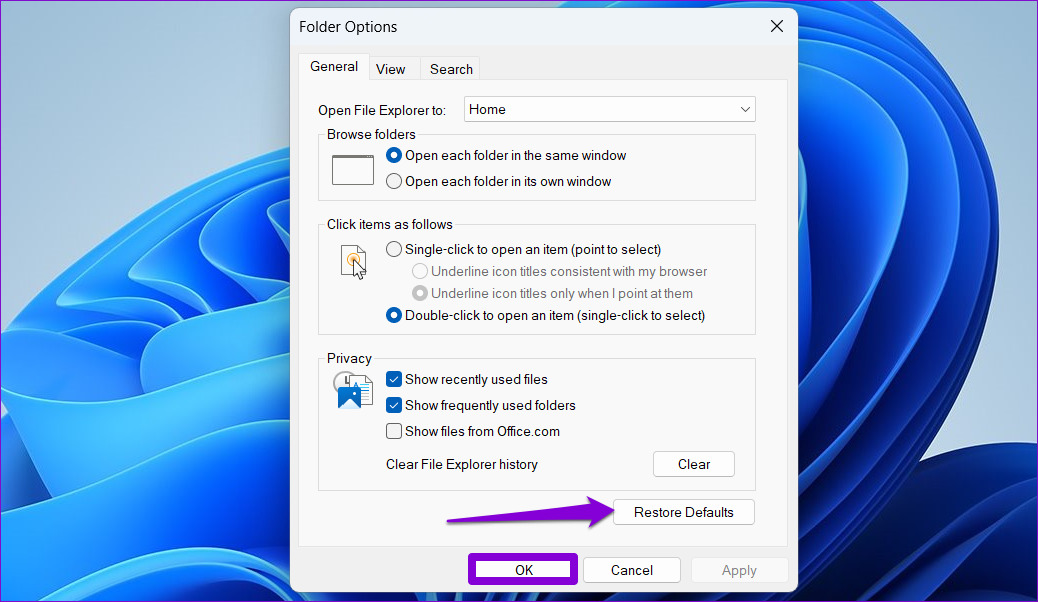
Step 2: In the Folder Options window, click the Restore Defaults button. Then, click on OK.
5. Reset Windows Quick Access Using Registry Editor
Registry Editor contains critical settings for Windows and its applications. Hence, you should proceed with caution and follow the steps carefully. Also, make sure you back up all the registry files or create a restore point before using this method. After that, use the following steps to reset Quick Access with the Registry Editor. Step 1: Press the Windows key + R to open the Run dialog. Type regedit and press Enter.
Step 2: Select Yes when the User Account Control (UAC) prompt shows up.
Step 3: Paste the following path in the address bar at the top and press Enter to navigate to the Ribbon key.
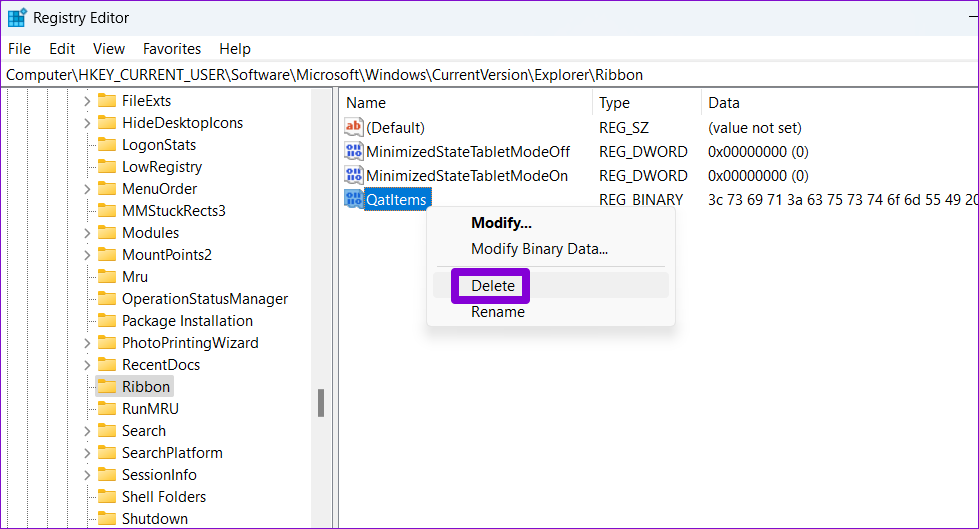
Step 4: Locate the QatItems entry from the right pane. Right-click on it and select Delete from the context menu.
Step 5: Select Yes to confirm.
Restart your PC and check if the Quick Access works.
The Quicker, the Better
Quick Access can be useful if you spend a lot of time in File Explorer looking for files and folders. However, when Quick Access stops working in Windows 11, it can disrupt your workflow and frustrate you. That said, fixing the issue should take a little time once you go through the solutions listed above. As always, let us know which did the trick for you in the comments below. The above article may contain affiliate links which help support Guiding Tech. However, it does not affect our editorial integrity. The content remains unbiased and authentic.