If you take your phone and laptop’s security more seriously than others, it’s a good idea to use MAC randomization, also known as MAC spoofing. In this post, we will explain what MAC randomization is and how it works. Also, we’ll show you how to use it on your Windows 11/macOS PC, and Android/iOS smartphone to hide your device’s identity when connecting to unknown or public networks.
What Is MAC Randomization and How Does It Work
To use MAC randomization, you’ll need to know what MAC address really is. The MAC or Media Access Control Address is a unique 12-digit alphanumeric identifier assigned to a device capable of internet connectivity. That helps to identify the device on the network. So whenever you connect your phone, laptop, tablet or other device to your Wi-Fi Network, the router can identify all the devices using their MAC address. Similarly, when you connect your laptop or phone to a public wireless network, you risk exposing the device’s original MAC address that can reveal its identity and location. That’s why MAC randomization helps you assign a temporary MAC address to your device.. That way, you reduce the privacy risk associated with revealing a device’s original MAC address. Also, you can ensure safety and privacy of all your wireless devices. If someone captures their MAC address over a public or shared Wi-Fi network, the original MAC address of your devices will remain hidden.
How to Enable MAC Randomization On Windows 11
You’d mostly use your Windows 11 computer to your home network and the office network. However, you might have to carry your Windows 11 laptop around, and might end up connecting it to public hotspots. Before you do that, here’s how to enable MAC randomization on your Windows 11 PC: Step 1: Use the Win + I shortcut to open the Settings app. Then head to ‘Network & internet’ section in the left column.
Step 2: Under Network & internet section, click on the Wi-Fi option.
Step 3: Turn on the toggle for the ‘Random hardware addresses’ option.
The ‘Random hardware addresses’ allows you to enable MAC randomization whenever you connecting your Windows 11 laptop to other networks. Do you want to enable or disable MAC randomization for a specific network? Continue the steps. Step 4: In Wi-Fi section, click the ‘Manage known networks’ option.
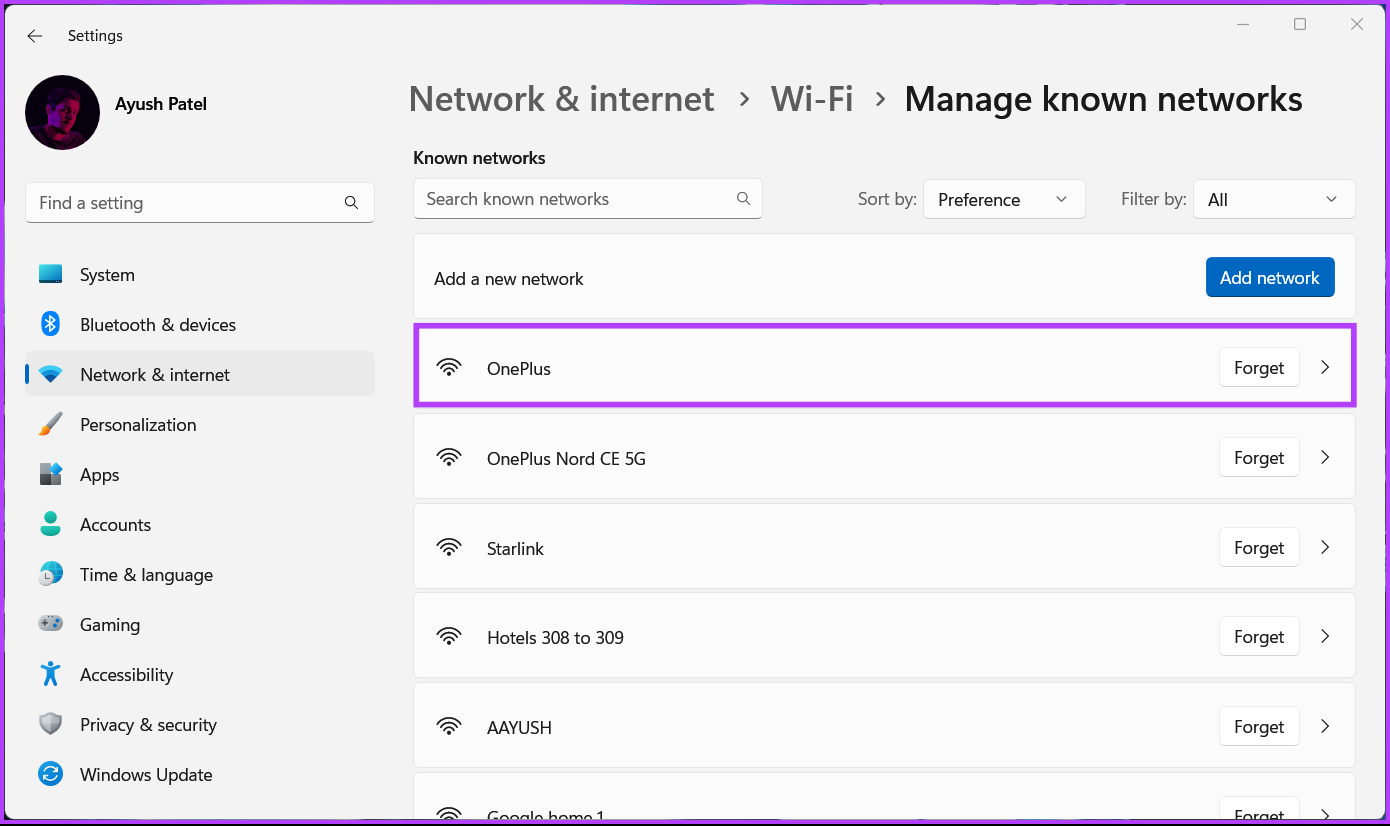
Step 5: Click on the Wi-Fi network you want to configure.
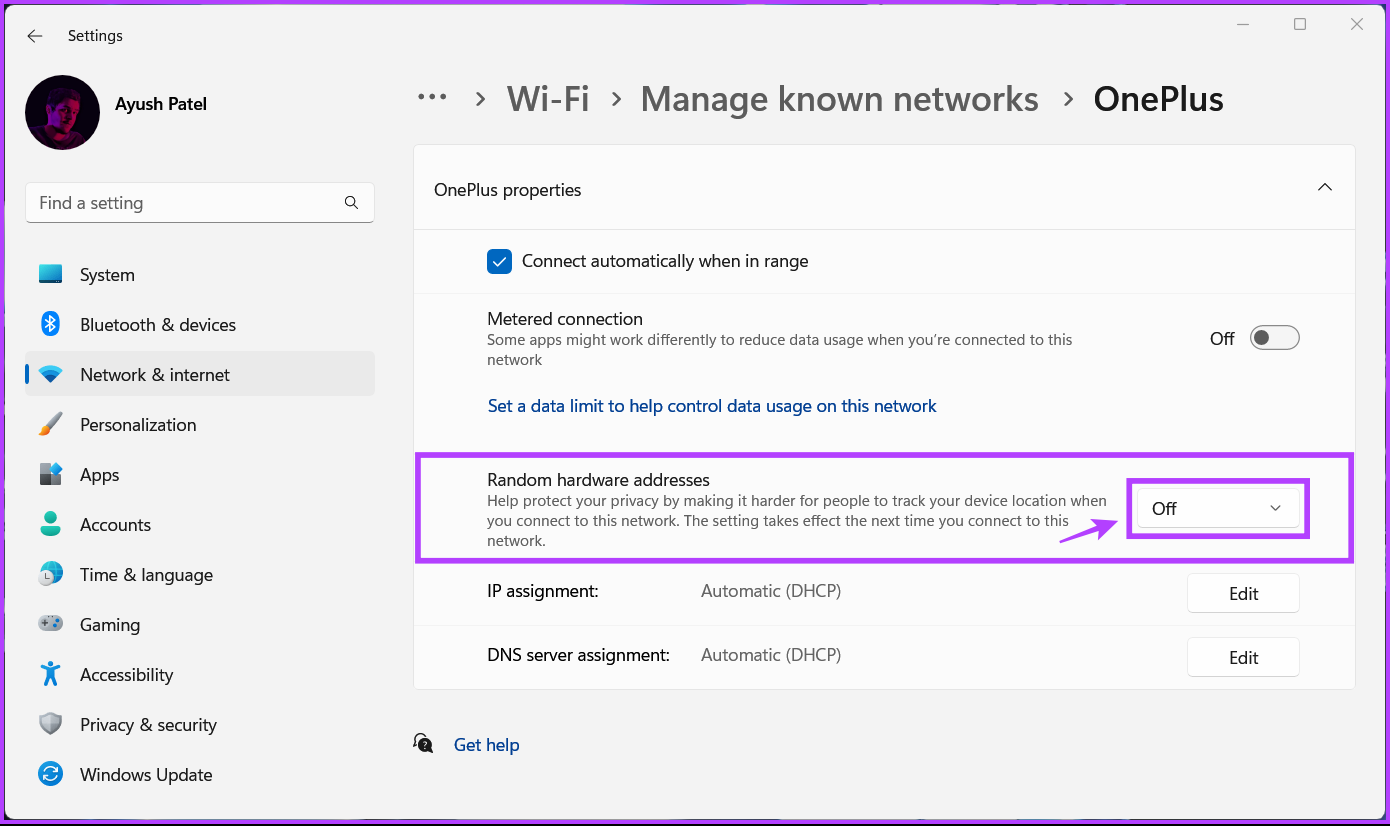
Step 6: Click on the little drop-down next to ‘Random hardware addresses’ option and select On or Change daily.
How to Enable MAC Randomization on Android
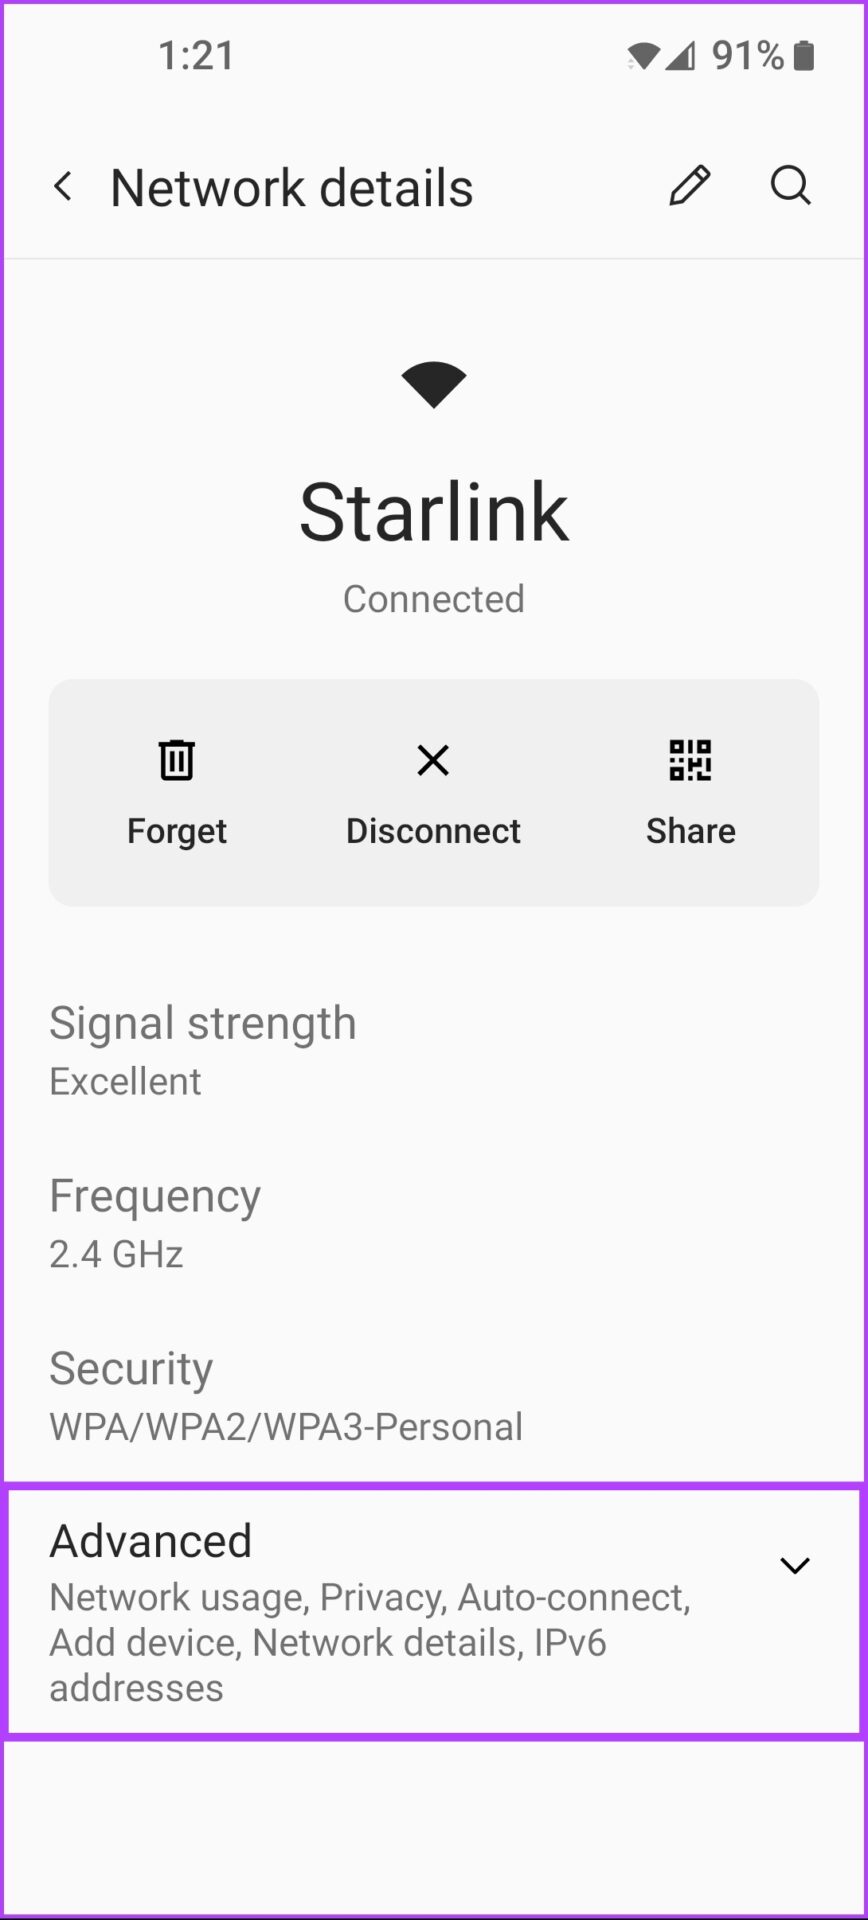
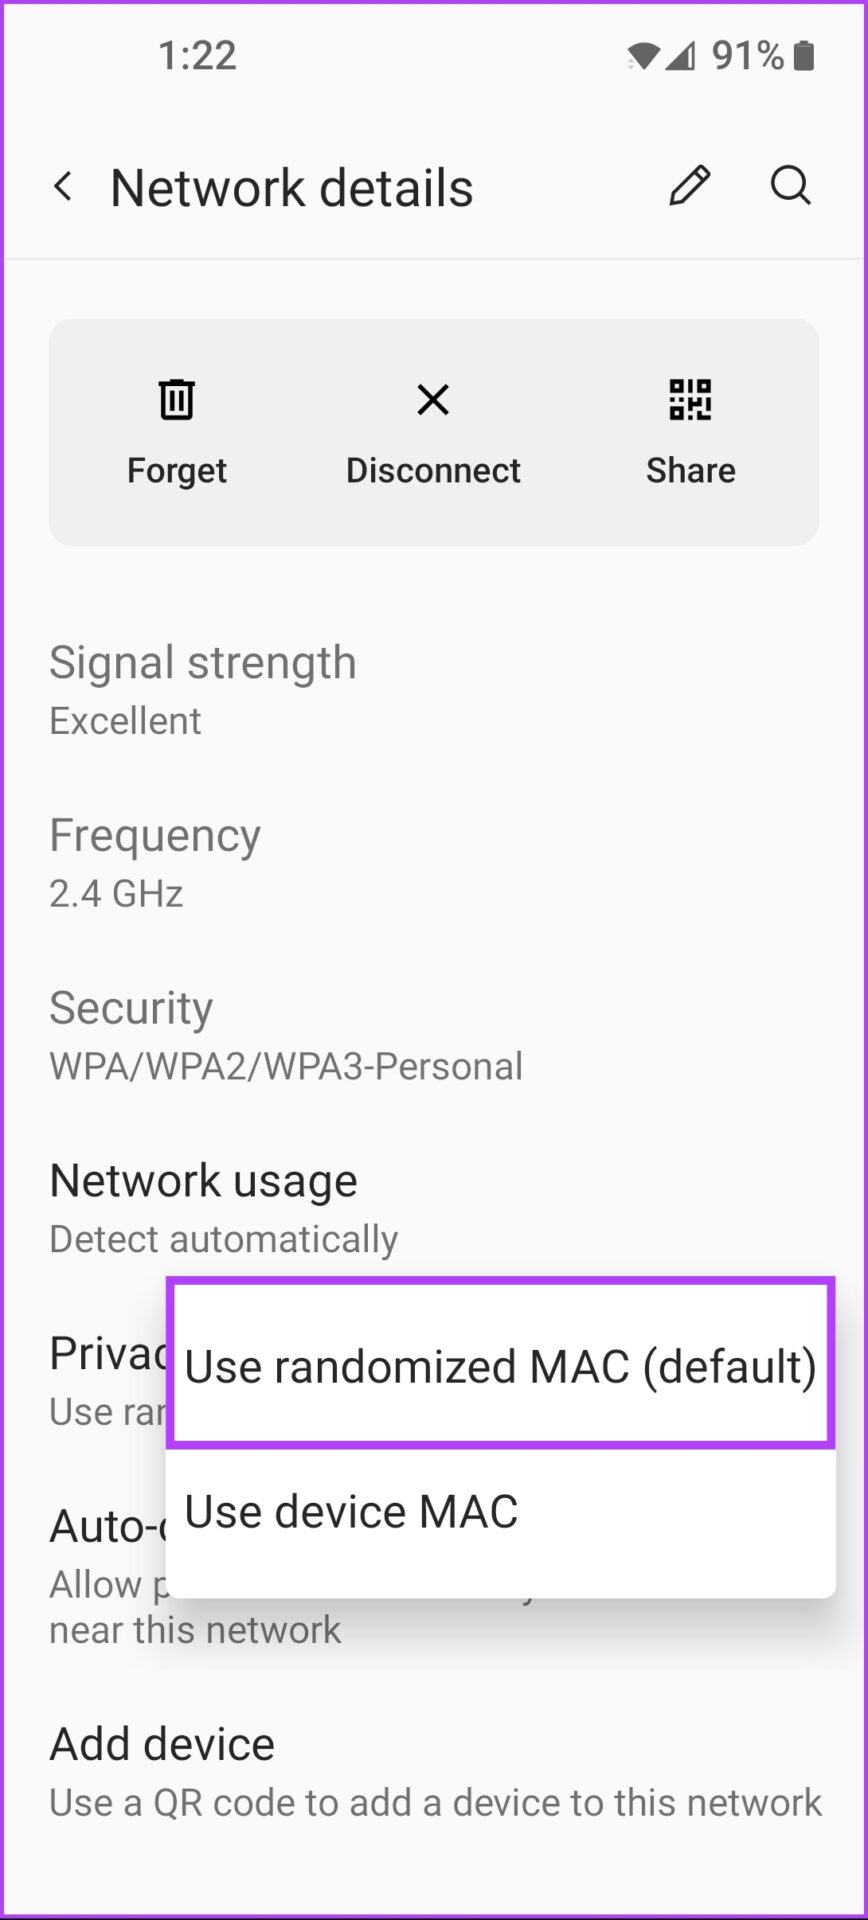
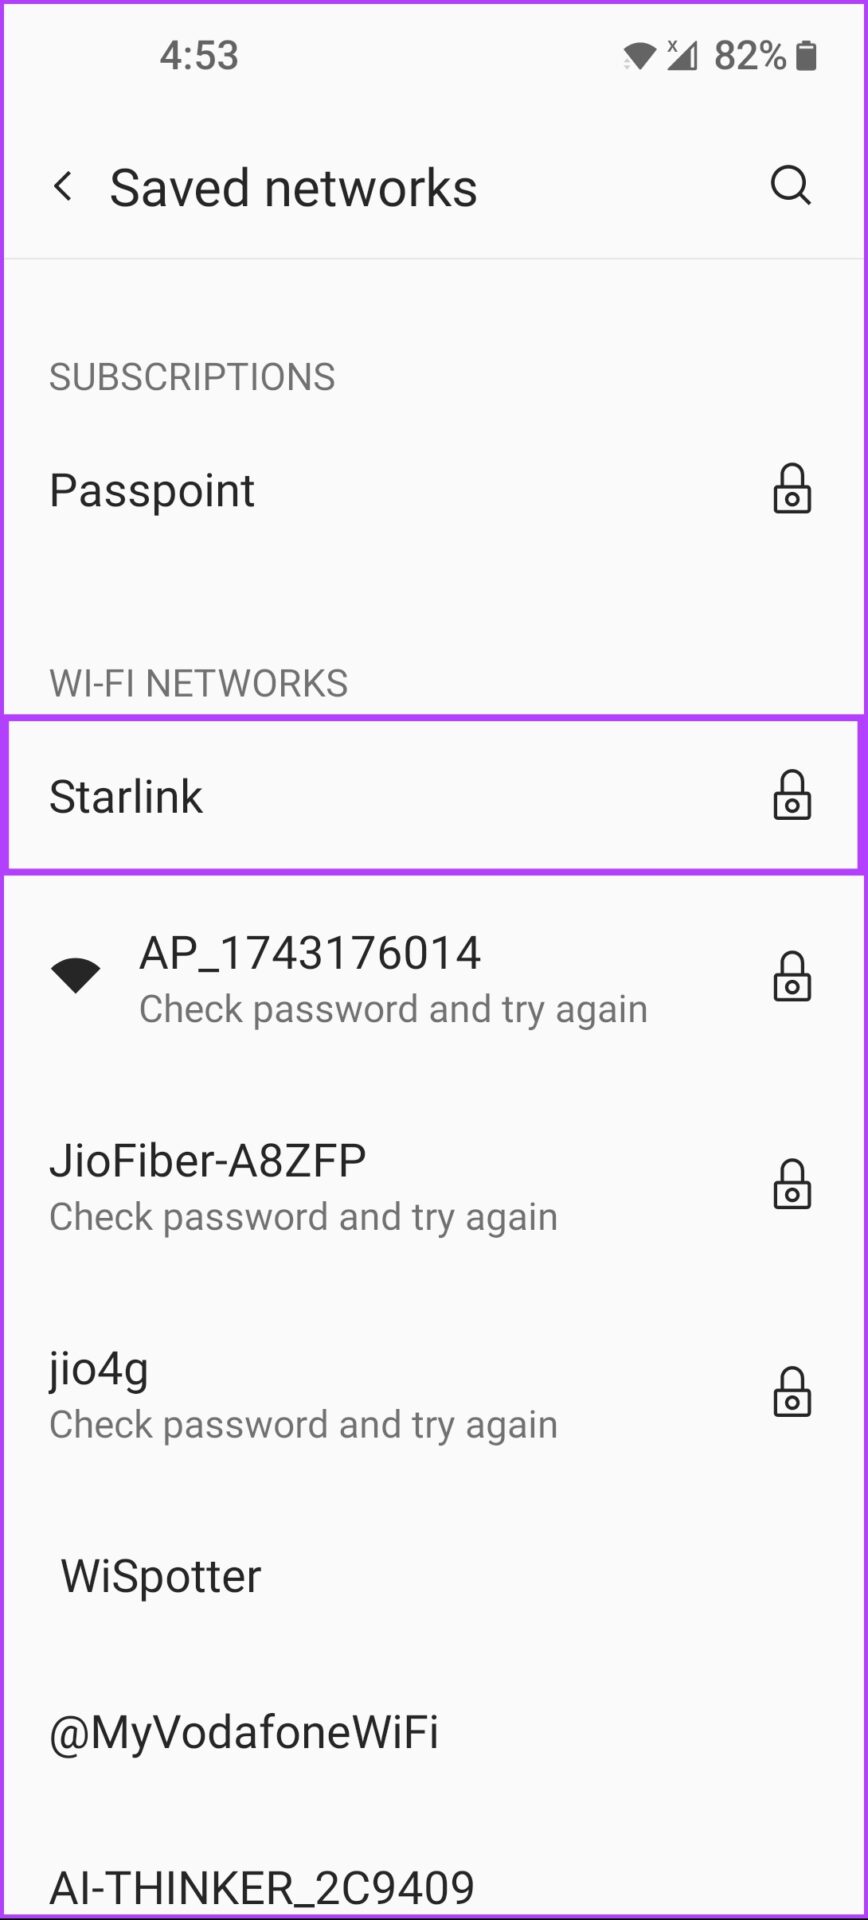
Who doesn’t like using free and open wireless network with the Android smartphone? While that’s convenient, it poses security risk revealing your Android phone’s MAC address over the network. Most Android devices starting with Android 10, come with the MAC randomization feature turned on by default. However, it’s always better to be sure than sorry, especially with all the different device manufacturers implementing different configurations that might change from one android device to another. Here’s how you can enable MAC randomization on your Android phone or tablet: Step 1: Open the Settings app on your Android. Step 2: Inside the Setting app, tap on ‘Wi-Fi & Network.’ Step 3: Tap on the Wi-Fi option under ‘Wi-Fi & Network,’ Step 4: Look for the Wi-Fi network connected to your Android and tap the gear icon next to it. Step 5: Under Network details, tap on the Advanced drop-down. Step 6: Scroll down, and check which option is selected under Privacy. Step 7: If the option under Privacy says ‘Use device MAC’ tap on the Privacy option and select the ‘Use randomized MAC’ option. Meanwhile, if you want to enable MAC randomization for specific networks on your Android device, you can continue the steps. Step 8: Head back twice to the Wi-Fi screen as it appears in the fourth step. Scroll down and tap on the ‘Saved networks’ option. Step 9: Tap on the Wi-Fi network that you want to configure (refer Steps 5 to 7 above).
How to Enable MAC Randomization on iOS And iPadOS
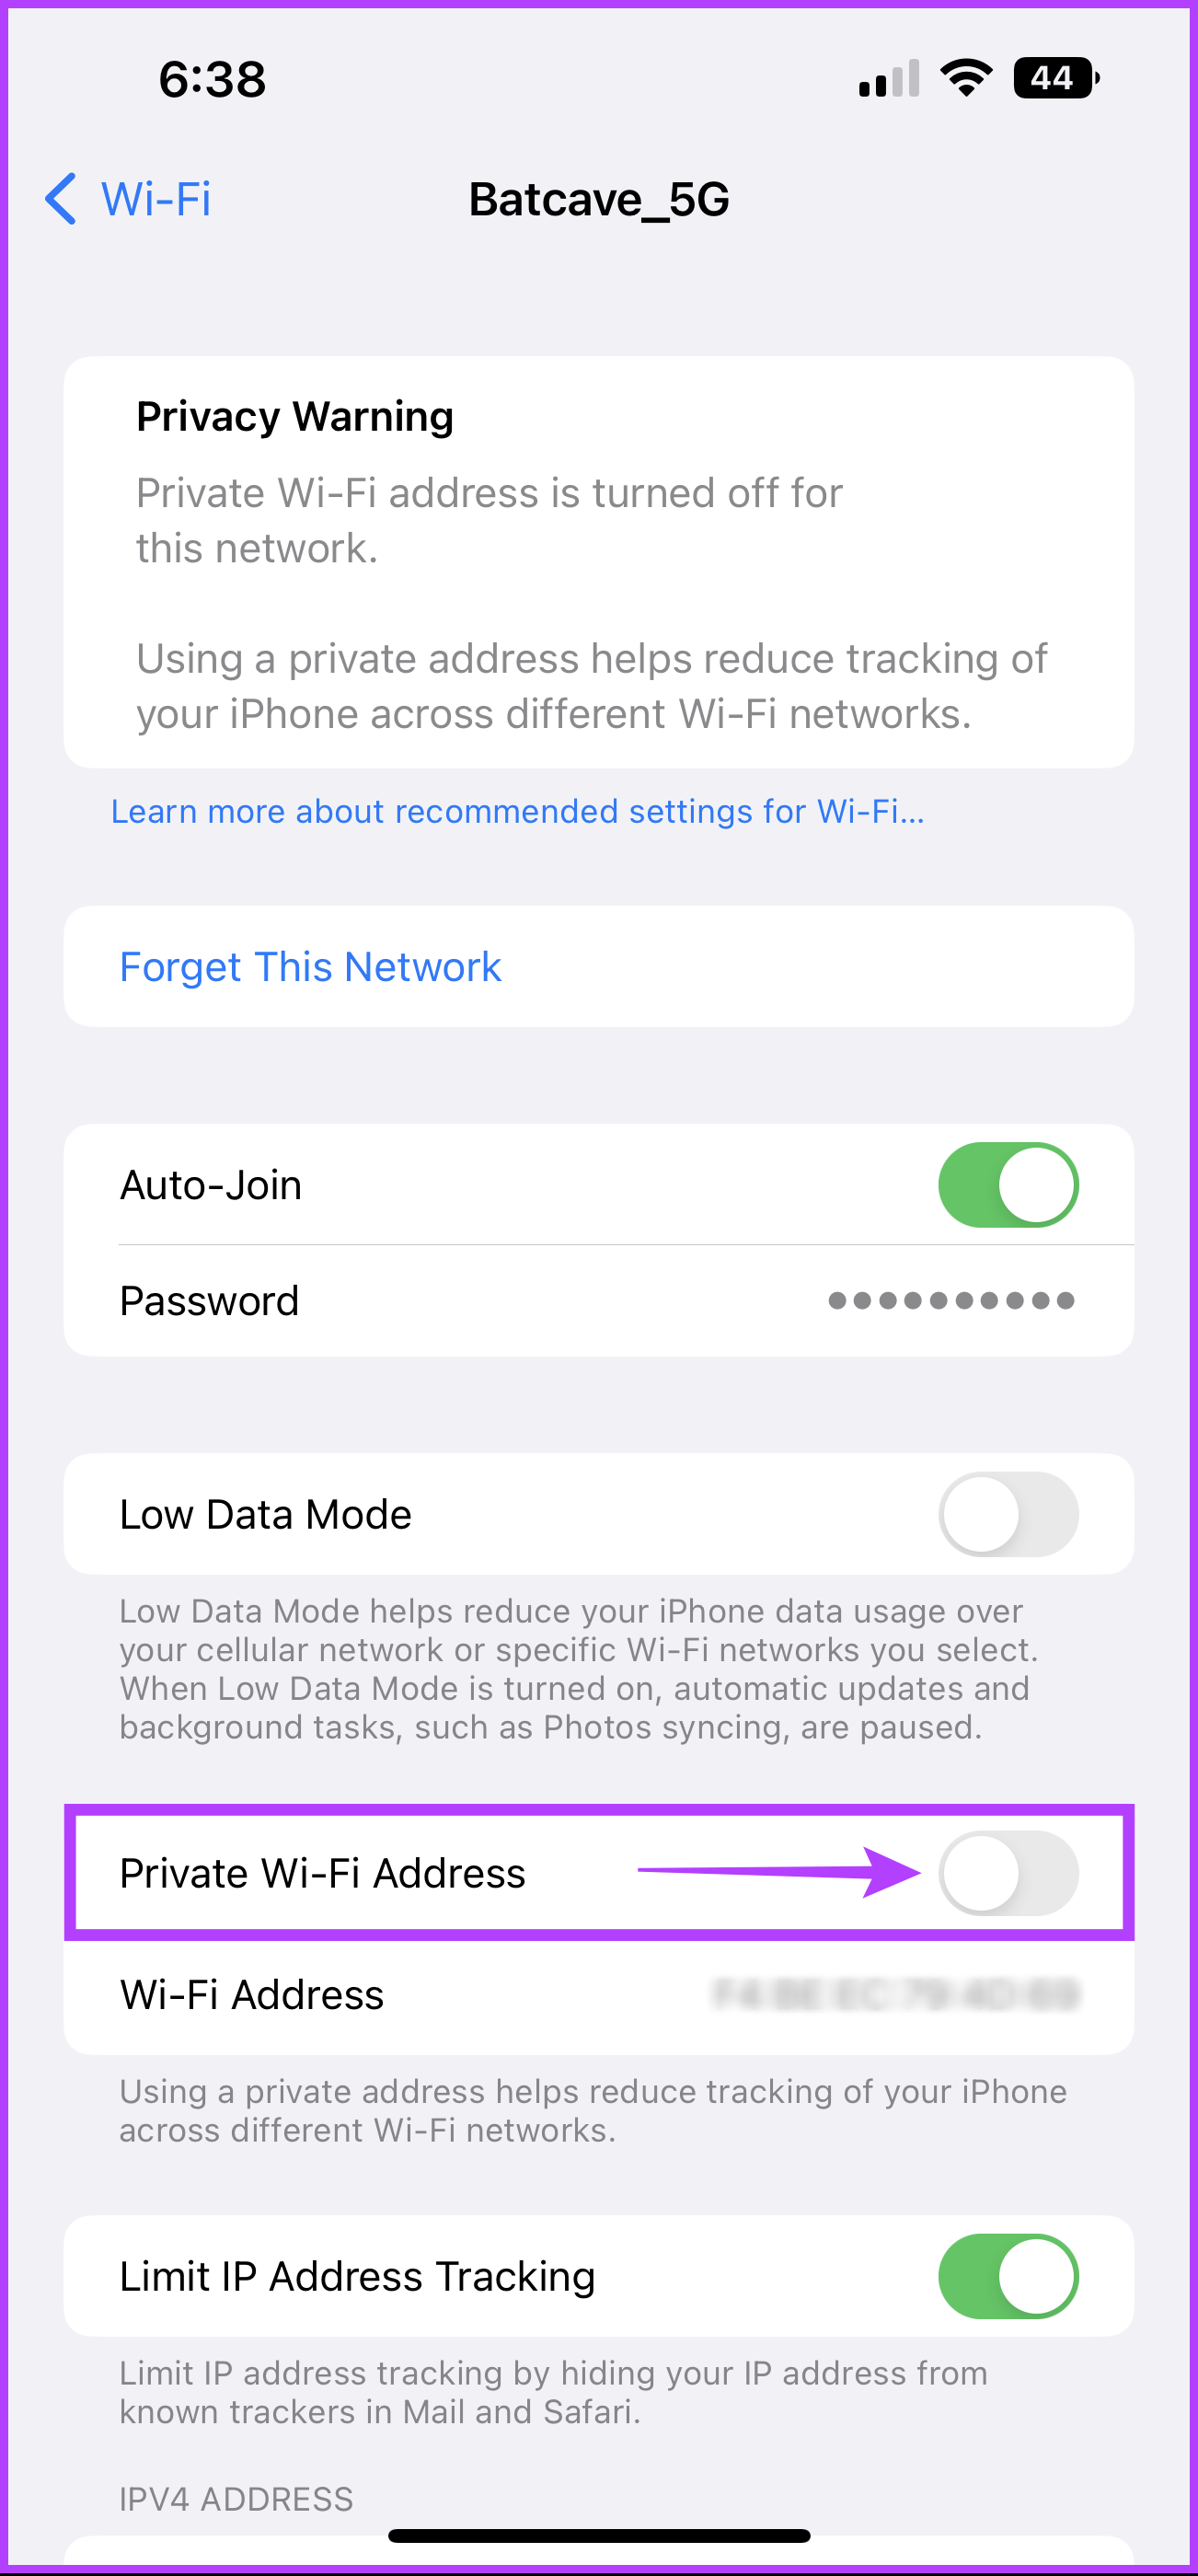
Apple also integrates the MAC randomization option in iOS and iPadOS with the ‘Private Wi-Fi Address’ feature. However, unlike the former, Apple doesn’t allow users to enable MAC randomization for all the networks. Rather, users have to turn on MAC randomization manually for each wireless network. The steps remain nearly the same between iOS and iPadOS. Here’s how you can turn on MAC randomization on your iOS or iPadOS device using the ‘Private Wi-FI Address’ feature: Step 1: Head to the Settings App on your iPhone or iPad. Step 2: Inside settings, tap on Wi-FI. Step 3: Under Wi-Fi, tap on the circular blue i button that can be found beside your currently connected or saved Wi-Fi network. Step 4: Tap on the toggle next to ‘Private Wi-FI Address’. Step 5: Tap on Continue, to enable Private Wi-FI Address.
Can You Enable MAC Randomization on Mac?
Unfortunately, Apple doesn’t allow MAC randomization directly on Mac. The other process is quite complicated and requires you to install Homebrew, a free open source package management system and a tool using that. Only after that you can use a free and open souce tool called Spoof-mac to do the needful.
Security Is A Choice
That pretty much sums up what MAC randomization is and how you can easily enable it on your PC or smartphone to cloak your digital footprint. However, this doesn’t mean you can connect your devices to whichever network you want to. To ensure that your devices aren’t vulnerable in any way, you should always be wary of which network you connect your devices to while refraining from connecting them to unknown Wi-Fi networks or public hotspots whenever possible. The above article may contain affiliate links which help support Guiding Tech. However, it does not affect our editorial integrity. The content remains unbiased and authentic.


